
Introduction
Indoor cannabis growing can be an enriching and productive experience that provides growers with complete control over the growing environment and allows them to cultivate all year round. Understanding the key steps and techniques is essential for a successful harvest, whether you’re a first-time grower or an experienced cultivator. This guide provides a comprehensive overview of all the necessary information to grow cannabis indoors, including how to choose the right strains and when to harvest your plants.
First and foremost, selecting the right strain is crucial for a successful indoor cannabis grow. Factors to consider include its growth traits, flowering time, and yield potential. Common strains suitable for indoor growing include Northern Lights, Blue Dream, and OG Kush, among others. Once you’ve secured your seeds or clones, the next step is to create the optimal growing environment. This includes setting up grow lights, controlling humidity and temperature, and providing proper ventilation.
Next, when growing cannabis indoors, the soil or growing medium plays a critical role in the plant’s success. Soil mixtures must be consistent and balanced in nutrients and should be supplemented with extra nutrients as the plants mature. Many indoor growers prefer to use hydroponics, which involves growing plants in a nutrient-rich water solution without soil.
Regular monitoring of plant health is essential. This entails regularly checking and adjusting light, temperature, and humidity levels as required, as well as keeping an eye out for common issues such as pests, mold, and over- or under-watering. Maintaining proper timing with the vegetative and flowering stages will also be important as it can impact the plant’s growth and harvest potential.
The harvesting process varies depending on the chosen strain and growing method, but most growers look for key signs such as trichomes, pistils, and bud density to determine optimal harvest time. Once the buds have been harvested, they must be dried and cured carefully to ensure a high-quality end product.
Indoor cannabis growing provides growers with tremendous flexibility, enabling them to grow year-round and fully control the growing environment. However, to ensure a successful harvest, growers must follow specific steps and techniques, including choosing the right strain, creating an optimal growing environment, using appropriate soil or
Selecting the Right Strains
The first step in growing cannabis indoors is choosing the right strains. Consider the following factors:
1. Growth Characteristics
When it comes to indoor cannabis cultivation, growth characteristics play a significant role in determining the suitability of a strain. Different strains have distinct growth habits that can influence their adaptability to indoor environments.
- Indica Strains: Indicas are generally preferred for indoor growing due to their compact structure. These plants tend to be shorter and bushier, rarely exceeding 3-6 feet in height. This makes them ideal for indoor setups with limited vertical space. Their dense foliage and robust branches support the weight of heavy buds, which is advantageous in smaller grow spaces. Indicas also have shorter internodal spacing, leading to more bud sites and potentially higher yields per square foot.
- Sativa Strains: Sativas, on the other hand, are known for their tall and lanky growth patterns. They can easily reach heights of 8-12 feet if left unchecked, which can be challenging to manage indoors. However, with proper training techniques such as topping, low-stress training (LST), or using a Screen of Green (ScrOG) method, sativas can be tamed to fit within indoor grow rooms. These techniques help control the height and spread of the plants, ensuring they receive adequate light and airflow.
2. Flowering Time
The flowering time of cannabis strains varies significantly between Indicas and Sativas, affecting the overall growing timeline.
- Indica Strains: Indicas typically have a shorter flowering period, ranging from 8 to 10 weeks. This quick turnaround is beneficial for indoor growers aiming to maximize their harvests within a shorter time frame. Indica’s faster flowering cycle allows for multiple harvests per year, making them an efficient choice for indoor cultivation.
- Sativa Strains: Sativas generally have a longer flowering period, often taking 10 to 16 weeks to mature. While this extended timeline requires more patience, it can result in larger plants and potentially higher yields. Sativas’ longer flowering cycle can be a challenge for indoor growers, but the rewards can be substantial, particularly in terms of the plant’s size and bud production.
3. Desired Effects
The effects of cannabis are largely determined by its cannabinoid and terpene profiles, which vary between strains. Selecting a strain based on desired effects ensures that your final product meets your specific needs.
- Relaxation: For those seeking relaxation, stress relief, or assistance with sleep, Indica strains are often recommended. Indicas are known for their sedative effects, providing a calming body high that can help with pain relief, muscle relaxation, and insomnia. Popular Indica strains include Northern Lights and Granddaddy Purple.
- Pain Relief: Both Indica and high-CBD strains are effective for pain relief. CBD, a non-psychoactive cannabinoid, is known for its anti-inflammatory and analgesic properties, making it a good choice for those who need pain relief without the psychoactive effects of THC.
- Creativity and Energy: If you’re looking for an uplifting and energizing experience, Sativa strains are ideal. Sativas provide a cerebral high that can enhance creativity, focus, and social interaction. They are perfect for daytime use or activities that require mental clarity and energy. Popular Sativa strains include Sour Diesel and Jack Herer.
- Balanced Effects: Hybrid strains offer a balance of Indica and Sativa effects. Depending on the ratio of Indica to Sativa, hybrids can provide a mix of relaxation and mental stimulation. Hybrids like Blue Dream and White Widow are versatile, catering to those who want a bit of both worlds.
Also Read: Why Proper Lighting is Crucial for Cannabis?
Setting Up Your Grow Space
Creating an optimal environment for growing cannabis indoors is crucial for a successful harvest. By carefully setting up your grow space, you can ensure your plants receive the right conditions to thrive. Here’s a detailed guide on how to set up your grow room or tent, including lighting, ventilation, temperature, humidity control, and choosing the right growing medium.
1. Grow Room or Tent
The foundation of your indoor grow operation is the space you choose. A dedicated grow room or tent provides the best environment for cannabis cultivation:
- Grow Tents: Grow tents are an excellent choice for indoor growing because they are designed specifically for plants. They feature reflective interiors that maximize light efficiency, helping your plants absorb more light and grow more robustly. Tents also offer superior environmental control, allowing you to easily manage temperature, humidity, and airflow. They come in various sizes to fit different spaces and can be set up in spare rooms, basements, or closets.
- Dedicated Space: If you prefer using a room, ensure it can be sealed off to control light exposure and maintain a stable environment. Line the walls with reflective materials like Mylar to enhance light distribution, and make sure the space can accommodate the necessary equipment for lighting, ventilation, and temperature control.
2. Lighting
Proper lighting is essential for healthy cannabis growth. The type of light you choose can significantly impact plant health and yield:
- LED Lights: LEDs are popular for their energy efficiency, longevity, and full-spectrum light output. They produce less heat than traditional lights, reducing the risk of heat stress and lowering cooling costs. Modern LED grow lights can be adjusted to emit specific wavelengths, ideal for different stages of plant growth.
- High-Intensity Discharge (HID) Lights: HID lights, including Metal Halide (MH) and High-Pressure Sodium (HPS) lamps, are effective for cannabis cultivation. MH lights are suitable for the vegetative stage due to their blue spectrum light, while HPS lights are ideal for the flowering stage because they emit red and orange light. However, HID lights generate more heat and require robust ventilation systems to manage temperature.
3. Ventilation
Ventilation is critical to prevent mold, pests, and ensure your plants get the fresh air they need:
- Exhaust Fans: These remove hot, stale air from the grow space, helping to control temperature and humidity. Place exhaust fans near the top of the grow room or tent where hot air accumulates.
- Intake Fans: These bring fresh air into the grow space. Position intake fans at the bottom to pull in cooler air from outside the room.
- Oscillating Fans: These fans improve air circulation within the grow space, ensuring even distribution of CO2 and preventing hotspots. They help strengthen plant stems by simulating natural wind conditions.
4. Temperature and Humidity
Maintaining the right temperature and humidity levels is vital for cannabis growth:
- Temperature: Cannabis plants thrive in temperatures between 70-85°F (20-30°C) during the day and slightly cooler temperatures at night. Use heaters or air conditioners to maintain these levels.
- Humidity: During the vegetative stage, keep humidity levels between 40-60%. Lower the humidity to 40-50% during the flowering stage to prevent mold and mildew. Use humidifiers or dehumidifiers to adjust humidity levels as needed.
5. Growing Medium
The choice of growing medium affects how you feed and water your plants:
- Soil: Soil is the most traditional and beginner-friendly growing medium. It’s forgiving and provides a buffer for nutrients, which makes it easier to manage feeding schedules. Use high-quality potting soil with added perlite or vermiculite for better drainage and aeration.
- Hydroponics: This soilless growing method involves growing plants in a nutrient-rich water solution. Hydroponics allows for precise control over nutrient delivery and often results in faster growth and higher yields. However, it requires more equipment and experience to manage correctly.
- Coco Coir: Made from coconut husks, coco coir is an excellent alternative to soil. It offers good drainage and aeration, similar to hydroponics, and retains water and nutrients efficiently. Coco coir is relatively easy to use and provides faster growth rates than traditional soil.
Setting up an indoor cannabis grow space involves careful planning and attention to detail. By choosing the right grow room or tent, investing in proper lighting, ensuring adequate ventilation, maintaining optimal temperature and humidity levels, and selecting the appropriate growing medium, you can create an ideal environment for your cannabis plants to thrive. Whether you are a novice grower or an experienced cultivator, following these guidelines will help you achieve a successful and bountiful harvest.
Germination and Seedling Stage
Germination and transplanting are essential steps in the indoor cannabis cultivation process, laying the foundation for healthy plant growth and development. By following these guidelines and providing proper care and attention to your seedlings, you can ensure a successful start to your indoor garden. Remember to be patient and attentive throughout the germination and transplanting process, as this will ultimately lead to strong, robust plants capable of producing high-quality buds.
Germination Process
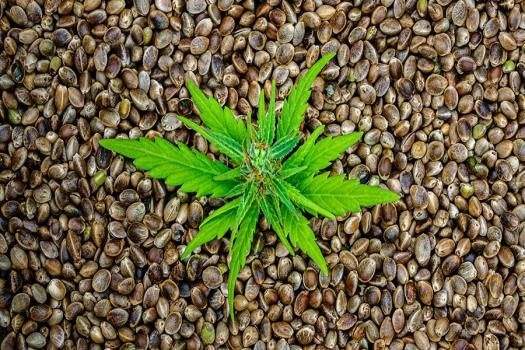
Germination is the first crucial step in starting your indoor cannabis garden. Follow these steps to ensure successful seed germination:
- Seed Selection: Begin with high-quality cannabis seeds from a reputable source. Choose seeds that are dark brown and firm to the touch, indicating maturity and viability.
- Preparation: Prepare for germination by gathering supplies such as paper towels, plates, and a spray bottle filled with water.
- Germination Method: Use the paper towel method for germination. Place your cannabis seeds between moist paper towels on a plate. Ensure the paper towels remain moist but not waterlogged throughout the process.
- Warmth and Darkness: Place the plate with the seeds in a warm, dark area, such as a closet or cabinet. The ideal temperature for germination is around 70-85°F (21-29°C).
- Patience and Monitoring: Check on your seeds daily to ensure they remain moist and to monitor their progress. Most seeds will germinate within 24-72 hours, although some may take longer.
- Sprouting: Once the seeds have sprouted and the taproot is visible, they are ready for transplanting.
Transplanting Seedlings
Transplanting seedlings is the next step in the cultivation process, allowing them to establish roots and grow into healthy plants. Follow these guidelines for successful transplanting:
- Prepare Growing Medium: Fill small pots with your chosen growing medium, such as soil or coco coir. Ensure the medium is pre-moistened but not waterlogged.
- Transplanting Process: Gently transfer the sprouted seeds to the prepared pots, being careful not to damage the delicate roots. Create a small hole in the center of the medium and place the seedling inside, covering the roots with soil or medium.
- Light and Environment: Place the newly transplanted seedlings under gentle light, such as fluorescent or LED grow lights. Avoid placing them under intense light or direct sunlight, as this can stress the delicate seedlings.
- Temperature and Humidity: Maintain optimal temperature and humidity levels in the growing environment to promote healthy growth. Keep temperatures around 70-85°F (21-29°C) and humidity levels between 40-60%.
- Watering: Water the seedlings gently after transplanting to ensure the soil or medium is evenly moist. Avoid overwatering, as this can lead to root rot and other issues.
- Vegetative Growth: Continue to provide proper light, temperature, and humidity conditions to encourage vegetative growth. Monitor the seedlings closely for signs of stress or nutrient deficiencies and adjust care as needed.
Vegetative Stage
During the vegetative stage, it is crucial to closely monitor the plants for any signs of nutrient deficiencies, pests, or diseases. Regularly check the pH and adjust it if necessary to ensure optimal nutrient uptake. Adequate air circulation and ventilation should be provided to prevent the buildup of excess humidity and minimize the risk of mold or mildew. Additionally, maintaining a clean and organized growing space is crucial for healthy plant development. Regularly remove any dead or yellowing leaves, as they can attract pests or harbor diseases.
1. Lighting Schedule
In the vegetative stage, it is recommended to maintain an 18/6 light schedule. This means providing 18 hours of light and 6 hours of darkness. This specific lighting schedule promotes vigorous growth, allowing the plants to develop strong and healthy foliage.
2. Nutrients
It is essential to provide your plants with a balanced nutrient solution during the vegetative stage, with a particular emphasis on nitrogen content. Nitrogen is crucial for supporting the development of leaves and stems. However, it is important to carefully follow the instructions provided by the manufacturer to avoid overfeeding, which can lead to nutrient burn and other issues.
3. Training
Training techniques can be employed to manage plant height and enhance light penetration during the vegetative stage. One commonly used method is topping, where the main stem is carefully cut to stimulate lateral growth. This helps create a bushier canopy and promotes more even light distribution. Low-stress training (LST) involves gently bending and securing the branches to encourage horizontal growth and reduce height. Another technique called the Screen of Green (ScrOG) involves using a screen or net to train the plants’ branches to grow evenly, maximizing light exposure and optimizing canopy space.
Flowering Stage
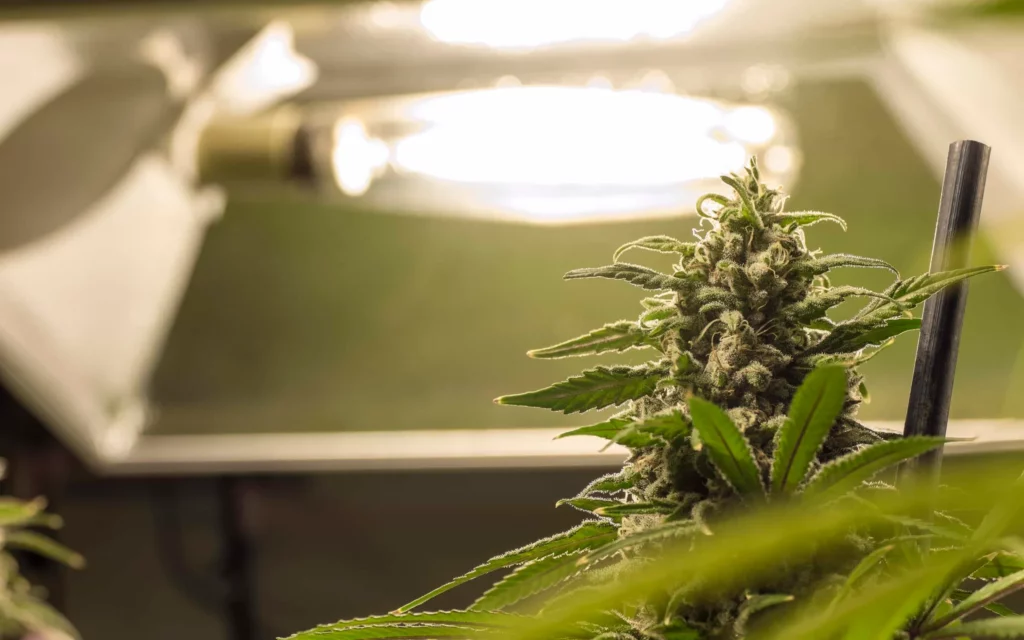
The flowering stage of cannabis is a pivotal period in the plant’s lifecycle, characterized by the development of buds rich in cannabinoids and terpenes. This stage marks the transition from vegetative growth to the production of flowers, signaling the onset of reproductive maturity. During this phase, cannabis plants undergo significant physiological changes in response to environmental cues such as changes in light cycle and nutrient availability. Cultivators carefully manage factors like light duration, humidity, temperature, and nutrient levels to optimize bud development and maximize yields. The flowering stage typically lasts for several weeks, with different strains exhibiting varying flowering times. Understanding the intricacies of the flowering stage is essential for cannabis growers seeking to cultivate high-quality, potent buds for medicinal or recreational use.
- Lighting Schedule: Switch to a 12/12 light schedule (12 hours of light, 12 hours of darkness) to initiate flowering. Ensure your grow space is completely dark during the dark periods to prevent stress.
- Nutrients: Transition to nutrients higher in phosphorus and potassium to support bud development. Reduce nitrogen to prevent leafy growth.
- Humidity and Temperature: Lower humidity to 40-50% and maintain temperatures around 65-80°F (18-26°C) to enhance bud quality and reduce mold risk.
Harvesting and Curing
Harvesting and curing represent the culmination of the cannabis cultivation journey, where careful planning, patience, and expertise converge to yield high-quality, potent buds. Harvesting involves the meticulous timing of cutting down mature cannabis plants at the peak of their cannabinoid and terpene production, ensuring optimal potency and flavor. However, the process doesn’t end there; curing is an equally crucial step that involves drying and aging harvested buds to enhance their flavor, aroma, and smoothness. Proper curing allows for the removal of excess moisture while promoting the breakdown of chlorophyll and other undesirable compounds, resulting in a smoother smoke or vapor and a more enjoyable cannabis experience. Understanding the nuances of harvesting and curing is essential for cultivators seeking to produce top-tier cannabis products with superior flavor, potency, and overall quality.
- Trichome Monitoring: Monitor the trichomes (resin glands) on your buds with a magnifying glass or microscope. Harvest when most trichomes are milky white with a few turning amber for a balanced effect.
- Cutting and Drying: Cut your plants and hang them upside down in a dark, cool, and well-ventilated area. Maintain humidity around 45-55% and temperatures between 60-70°F (15-21°C) for optimal drying.
- Curing: After drying, trim the buds and place them in airtight jars. Open the jars daily to release moisture and allow air exchange for the first couple of weeks. This curing process enhances flavor, potency, and overall quality.
Conclusion
Growing cannabis indoors offers the advantage of complete control over your growing environment, allowing for high-quality yields and year-round cultivation. By selecting the right strains, setting up a proper grow space, and following best practices for each stage of growth, you can achieve successful and rewarding results. Whether you’re growing for personal use or as a hobby, the journey of indoor cannabis cultivation is both challenging and immensely satisfying.